LiteSpeed Cache Settings In the ever-evolving landscape of web performance, having a robust caching solution is crucial for any website. LiteSpeed Cache is a powerful tool that can significantly enhance your website’s speed and efficiency. By optimizing your LiteSpeed Cache settings, you can ensure that your site runs smoothly, providing a better experience for your visitors. In this article, we’ll explore the various settings available in LiteSpeed Cache and how to configure them effectively.
Understanding LiteSpeed Cache
What is LiteSpeed Cache?
LiteSpeed Cache Settings is a server-level caching solution designed for websites running on LiteSpeed Web Server. Unlike traditional caching methods that operate at the application level, LiteSpeed Cache integrates directly with the server, allowing for faster data retrieval and improved resource management. This results in lower load times, reduced server load, and better overall performance.
One of its standout features is its ability to cache dynamic content, which is often a challenge for many caching solutions. With LiteSpeed Cache, even complex sites can benefit from speed enhancements without compromising functionality.
Key Features of LiteSpeed Cache
Before diving into the settings, it’s essential to understand the key features that make LiteSpeed Cache a popular choice among web developers and site owners:
- Automatic Cache Management: LiteSpeed Cache automatically clears outdated cached files, ensuring that users always receive the most current version of your content.
- Object Caching: This feature allows for the caching of database queries and other dynamic content, significantly reducing load times for frequently accessed data.
- Image Optimization: LiteSpeed Cache includes tools to optimize images by compressing them without sacrificing quality, which helps improve load times.
- Browser Caching: By enabling browser caching, LiteSpeed allows users’ browsers to store static files locally, speeding up page loads for repeat visitors.
Configuring LiteSpeed Cache Settings

Step 1: Installing LiteSpeed Cache
To get started with LiteSpeed Cache Settings you first need to install it. If you’re using WordPress, you can find the LiteSpeed Cache plugin in the plugin repository. For other platforms, ensure that your server is running LiteSpeed Web Server.
Once installed, activate the plugin and access the LiteSpeed Cache settings in your dashboard. Familiarize yourself with the interface, as it will be your control center for optimization.
Step 2: General Cache Settings
The general cache settings are the backbone of your caching strategy. Here’s how to configure them:
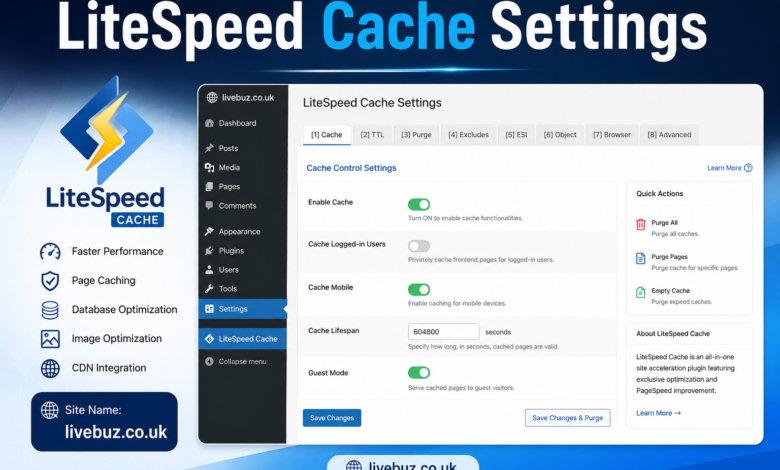
- Enable Cache: The first step is to enable the cache feature. Go to the LiteSpeed Cache settings and switch on the cache. This simple step can dramatically improve your site’s performance.
- Cache TTL (Time to Live): This setting determines how long cached content remains valid. A shorter TTL can ensure that your content is always up-to-date, while a longer TTL can reduce server load. For most sites, setting a TTL of 1-3 hours is a good balance.
- Cache Logged-in Users: If your site has a membership or login feature, consider enabling cache for logged-in users. This setting allows you to cache content for users who are logged in, improving performance for members while still providing personalized content.
Step 3: Object Cache Settings
Object caching is crucial for dynamic sites that rely heavily on database interactions. Here’s how to optimize this setting:
- Enable Object Cache: In the LiteSpeed Cache settings, look for the object cache option and enable it. This will allow frequently accessed database queries to be stored in memory, significantly reducing response times.
- Cache Purge: Set up automatic purging of the object cache when certain actions occur, such as content updates or user interactions. This helps maintain the accuracy of your cached data.
- Cache Storage: Choose between file-based storage or memory-based storage (like Redis or Memcached) for your object cache. Memory-based storage usually provides faster access times, but ensure your server has adequate resources to support it.
Step 4: Image Optimization Settings
Images can significantly impact page load times, so optimizing them is essential. Here’s how to configure LiteSpeed’s image optimization settings:
- Enable Image Optimization: In the settings menu, enable the image optimization feature. This will allow LiteSpeed to automatically compress and optimize images as they are uploaded.
- WebP Conversion: Consider enabling WebP conversion for your images. WebP is a modern image format that provides superior compression compared to traditional formats like JPEG and PNG, resulting in faster loading times.
- Responsive Images: Configure settings to serve different image sizes based on the user’s device. This ensures that mobile users don’t download unnecessarily large images, improving their experience.
Best Practices for LiteSpeed Cache
Monitor Your Site’s Performance
Once you have configured your LiteSpeed Cache settings, it’s essential to monitor your site’s performance regularly. Use tools like Google PageSpeed Insights or GTmetrix to analyze load times and identify areas for improvement. Keep an eye on your server load as well; if you notice significant spikes, it may be time to revisit your caching settings.
Regularly Update LiteSpeed Cache
LiteSpeed frequently releases updates that include new features and performance enhancements. Make sure to keep your LiteSpeed Cache plugin up to date to take advantage of these improvements. Regular updates can also help maintain security and compatibility with other plugins or themes you may be using.
Test Changes Thoroughly
Whenever you make changes to your LiteSpeed Cache settings, test your website thoroughly afterward. Ensure that all functionalities work as intended and that there are no issues with cached content. If you encounter any problems, consider rolling back to the previous settings and making adjustments incrementally.
Frequently Asked Questions (FAQ)
Q1: How does LiteSpeed Cache compare to other caching solutions?
A1: LiteSpeed Cache is often favored due to its server-level integration, which provides faster performance compared to many application-level caching solutions. It also offers robust features like object caching and image optimization, making it a comprehensive choice for website performance enhancement.
Q2: Can I use LiteSpeed Cache with other caching plugins?
A2: It is generally not recommended to use LiteSpeed Cache alongside other caching plugins, as this can lead to conflicts and unexpected behavior. If you choose to use LiteSpeed, it’s best to disable any other caching solutions.
Q3: Will LiteSpeed Cache improve my SEO?
A3: Yes, faster loading times can positively impact your SEO. Search engines like Google consider page speed as a ranking factor, so optimizing your site with LiteSpeed Cache can help improve your search visibility.
Conclusion
Optimizing your LiteSpeed Cache settings can lead to significant improvements in your website’s performance. By understanding the various settings and implementing best practices, you can enhance user experience, reduce load times, and potentially boost your search engine rankings. Remember to monitor your site regularly and keep your settings updated to ensure continued optimal performance.
Table: Summary of LiteSpeed Cache Settings
| Setting | Description |
| Enable Cache | Activates caching for your site |
| Cache TTL | Determines how long cached content remains valid |
| Cache Logged-in Users | Caches content for logged-in users |
| Enable Object Cache | Stores frequently accessed database queries |
| Enable Image Optimization | Compresses and optimizes images |
| WebP Conversion | Converts images to WebP format for better compression |
By following the guidelines and utilizing the features provided by LiteSpeed Cache Settings you can ensure that your website performs at its best, offering a seamless experience for all users.